Last updated on October 2nd, 2023
In the last few years real estate photography has gained tremendous popularity. Not only on the sellers side of real estate, but also as a business in itself. Now, real estate professionals count on a real estate photographer to take stunning photos that would be magazine-worthy.
Are you looking to become a real estate photographer? This guide on real estate is going to help you stand out from the crowd and be a professional photographer in real estate.
With real estate being such a large industry full of corporate investors, brokers, designers, and more, real estate photographers like you are at an advantage for a higher earning potential. And if you’re looking to become a photographer, real estate photography is a great way to market yourself as a professional photographer.

And, if you really want to, you could make the full-time leap to become a real estate photographer. The opportunity is waiting for you.
Realtors everywhere are competing against each other to sell homes day in and day out. That makes the demand for high-quality home photos even higher. High-quality home photography is the best way to market a home, too.
If you’re already a photographer, making real estate photography your specialty will keep you open for new opportunities and for a greater income to boot. However, property photography is competitive, like all other photography niches. So, you need to have better value than the other photographers out there with a real estate photography business.
This guide on how to shoot real estate photography will help you become a professional real estate photographer and teach you the tricks of the trade so you can get out there to get paid to take photos of properties.
What is Real Estate Photography Anyway?
Real estate photography is exactly what it seems. Real estate photography is the action of photographing buildings. Real estate photography includes photos of homes and buildings, land, and businesses, to market a property for sale to potential buyers or for rentals.
With real estate photography services, you will see wide yet detailed shots to convey all the property’s details, special features, detail, architectural layout, and lighting. It’s not just the photography of property the real estate photographer needs to capture. As a real estate photographer, you will need to prepare homes, negotiate contracts, and edit photos to showcase the property to the real estate market.
There are a number of real estate photography companies out there that specialize in a certain style of photography or area their business is located in. Many real estate photographers end up freelancing by selling their work on stock photo websites or blogging.
In many cases, aside from real estate agents, interior designers, decorators, interior architects, architects, and landscape designers look for real estate photographers to capture photography for their portfolios, websites, and specialty magazines and marketing materials.
How do You Become a Real Estate Photographer?
Becoming a real estate photographer is much like any photography niche. A real estate photography business entails having the right lenses, cameras, lighting equipment, editing apps, and of course, creativity.
Basic photography skills are a must to become a real estate photographer. Before venturing into real estate photography, you might want to research real estate photographers on the internet including YouTube, Pinterest, and Instagram. You’ll find some photography you aim to capture similarly. Take down notes of camera positions, staging trends, lighting and editing techniques, and styles of photography.
Next, try mimicking some of the best angles and techniques using your camera and start comparing yours to the top real estate photographers. Here, you’ll be able to note any gaps in your photography skills and work on them. That’s how you learn!
What You’ll Need for Your Real Estate Photography Business
Cameras and Lenses
Beginner cameras and DSLRs tend to have basic features you’ll need. Exposure bracketing and remote flash are two of the most needed features for real estate photography. The latest beginner digital cameras have multiple focus points. You’ll be able to get multiple sharp areas in your images.
The rise of 360 cameras in the real estate world has allowed buyers to take a virtual tour inside homes, which is becoming an increasingly popular marketing strategy.
Real Estate Photography Lenses
An ultra-wide-angle lens or a wide-angle lens helps smaller rooms appear to be big and full of space. Ultra-wide angle lenses are what it takes to create amazing real estate photography.
Wide angle lenses allow you to fit details into the frame that you wouldn’t get with a standard lens. This is especially important for outdoor photography. You want a focal length between 10 and 24mm.
Tripod
Tripods are extremely important for slow-speed exposures and telephoto lenses because you need maximum stability. Check out these best camera tripods for suggestions.
Camera Settings
Lighting is the top priority for real estate photography. You want to have a flash that is able to connect to your camera so you can get different spots and angles without much effort. Flash control is better when you set it to manual and start with the lowest power, then adjust to more power until your lighting is perfect.
It’s important to have straight and still cameras when shooting real estate photography. That’s why it’s so important to have a tripod when taking real estate photos. Try to get your camera off the ground at about five feet.
This way, you have less image blur and more of a neutral and balanced shot. Try getting the highest image clarity as possible, reduce highlights, and brighten any shadows in your shot.
Mastering Color and Lighting
Lights
Great architecture features aptly placed lighting fixtures that highlight the best structural features. Get started by examining the present light situation in or outside the property you’re photographing.
Begin by turning on all the lights in the room. No dark-spots is the perfect scenario to shoot real estate photography. If there are some dark spots, you will take some steps to fix the lighting. Consider the natural lighting as well, depending on where the windows are located.
If the windows have a nice view, you might want to feature the view in your photographs. If not, you can make the image highlight the visible light coming in. To do that you want to set up your camera so the window is on either side of the shot, not directly in front and capture the natural light.
Of course, light stands are always a great way to light up a room, making it look more natural. Check out these best ring lights and light stands for real estate photography.
Strobes and Flashes
A single flash in your kit is the most affordable option for lighting a room. It is also an un-intimidating method of lighting a room. Either use it wirelessly or use a light stand.
Hotshoe strobes are great for shooting with a higher ISO or with a wider/bright aperture. A more powerful strobe might be necessary so you can shoot at your lowest ISO and a small aperture. A powerful glass helps with bounding off high ceilings or to illuminate a property’s exterior at sunset.
A light scene will help you control direction and quality of light on the key subjects of your shot. The lighting being added directly will emphasize the subject to be more well-balanced of a photo. It’s not advised that you use a direct bare-bulb/strobe, they may create bright spots that make everything look unnatural.
Work with camera angles to minimize dark shadows. You could also try bouncing the flash off the ceiling for a more soft and even light. Just make sure you don’t get the ceiling in the frame of the shot, or else everything will look suspect with a weird bright spot.
Shoot HDR
HDR can make your real estate photography look closer than what the human eye sees in a standard image. You must create the look on your own. Start off by taking one base shot, then take a darker one, and then a brighter one than your base at the right exposure.
The base exposure will have your lighting techniques applied if you are bringing a standing light or a ring light. Your exposures should each be in one step increments: -2, -1, +1, +2.
As a beginner, it’s best to take several shots as you experiment with HDR, so you have more to work with when you layer your shots.
It costs you nothing to experiment with digital photography, and will make you a better real estate photographer in the long-run.
How to Shoot Real Estate Photography
Ditch the real estate photography classes and read this guide on how to shoot real estate photography. Let’s figure out the basics first: sharpness, contrast, exposure, and framing. As a rule of thumb, it’s best to avoid overexposing or underexposing your images. Start off with a smaller aperture like f/5.6 (or higher) to get the sharpest elements out of your shooting.
Effects are not needed for real estate photographers. A shallow depth of field, vignetting, and bokeh background won’t help your real estate photography. You want everything to be extremely sharp and detailed to show off the interior or exterior of the real estate.
Photographing Building and Home Exteriors
When you’re photographing buildings and home exteriors, you need to have a different approach than you would with interiors. Here are some steps you can take to take great exterior photos:
- Prep the property for the shoot. This includes getting landscaping cleaned up and making sure there aren’t any distractions on the property.
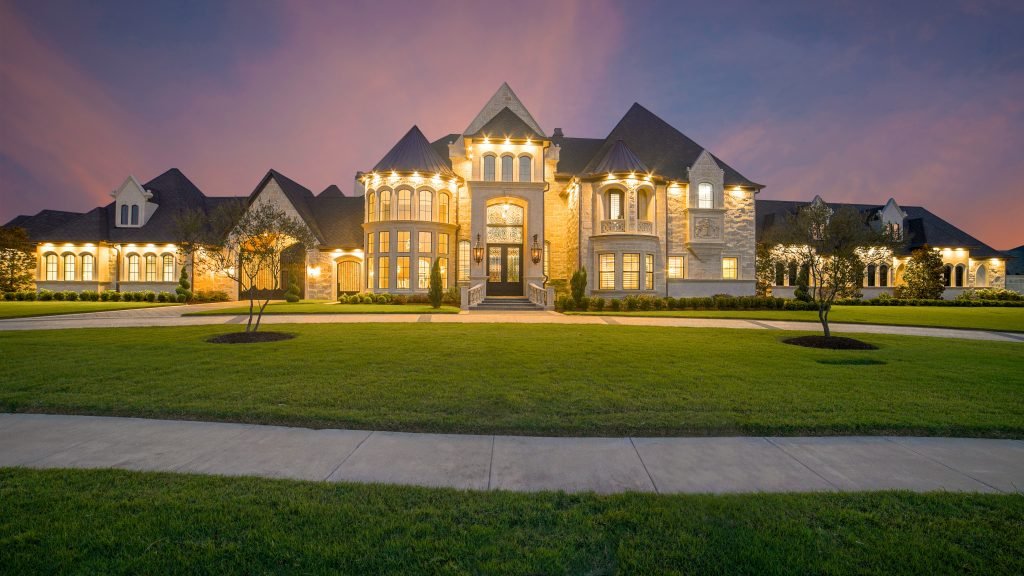
- Timing is everything, so make sure you have the position of the sun in mind. You don’t want your photos too underexposed or overexposed. Pay attention to when the sun sets and when the lighting is the softest. This is going to be further away from noon as possible, yet before the sun sets.
- Taking photos at dusk or early evening or early morning are great options for softer lighting.
- Play with angles to get the most flattering images as possible. Experiment with these angles depending on the style of the building. After a while, you will learn which angles work best.
- Use a tripod. You want your image to be as still as possible. Check out these best tripods for more.
- The horizon line should be straight and level. This means using the grid so the lines are perfectly straight.
- Focus on details of the building such as unique architectural elements.
- Use a drone to get complete shots of the property including overhead shots.
- This goes without saying – Retouch and edit all your shots.
Best Tips for Real Estate Photography
Remember these rules of thumb for taking real estate photos:
Indoor Focal Points
- Find the best features in the room and emphasize them in your photography. Maybe it’s a cool couch or a centerpiece or piece of art. You want to magnify the unique feature of the room to be attractive to the naked eye.
- Try not to cut doors off mid-frame or make awkward/odd framing.
Photographing Building Exteriors
- Show the surroundings on the property to emphasize the best unique features on the property. If you’re taking photos of a waterfall, the surrounding garden should be in the shot.
- Try not to overexpose photos under harsh lighting conditions. Again, early morning or late afternoon works the best. Natural light is evenly distributed.
Photographing Architecture at Night
- Maximize the amount of natural daylight coming in. If this means opening windows, then do so.
- Use reflectors and LED panels to magnify natural light, especially for highlighting smaller details like metal or wood.
Photographing interiors
Here are a few pro tips for interior real estate photography:
Lighting strategies
- Pre-shoot, walk around the property to note all the little details and areas. Take a few quick shots to get acquainted with each room. There, you can identify unique features and camera angles that will work best. This will help you map out lighting gaps, too.
- Make the unique features of the room the focal point of your indoor photography.
Staging and Styling interiors
- Details matter: meet with the client, style the room as you go, and sharpen your editing skills.
- Work in layers by doing separate bracketed shots (HDR images) for natural looking interior photographers.
- Composition guides shots, so brush up on color, balance, lines, depth, and white space.
- Add small styling touches by adjusting items in the room, especially when working with interior designers and their vision.
Dealing with Windows and Glass
Use panels and bounce flash
- Make sure the interior ambient light and daylight from outside is evened out by adding more light like light stands or use flash photography.
Sunlight and creating fake sunlight
- Make sure the look is natural, especially if using a strobe or flash.
- With artificial lighting, be sure to bounce or diffuse the lighting.
- Adjust the lighting strength for a natural look.
- You can bounce lighting by pointing the light towards the wall behind you or towards the ceiling.
- Use softboxes and umbrellas to help diffuse the light.
- Think about the color of the walls as it will affect the lighting.
Lighting a large room
- If using fake sunlight (like light stands and flash) turn the lights off as the lamps can make shadows, which is distracting.
Image Processing
Real estate professionals need a shorter turnaround time so they can show off the property to clients. That means your real estate photography needs to be edited quickly.
If you do multiple image processing or batch editing, you will find that your editing time will be cut in half. If your clients ask for a 24 or 48 hour turnaround, then editing each photo one-by-one will take too much time. That’s where batch editing comes in handy.
Adobe Lightroom is the best bet for batch editing. You will be able to edit the RAW images so they don’t get destroyed. What works well is Lightroom lets you revert your image editing if you need to go back to the original photo.
Real Estate Photography Shot List
Planning ahead for professional photos is the most professional thing you can do. Your results will turn out so much better, and impress your clients with your professionalism. Openly communicate with your client so you know what to photograph.
- Ask the client what exactly they need photographed and details they want to see. Also, figure out how many interior photographs they want in the end.
- Plan a site visit before shooting day. That way, you will get a better idea of what areas work best in the photos. This will help you figure out when the lighting is best at different times of the day.
- Also, know the orientation of the building. You’ll be able to minimize overexposing a room from strong sunshine. You’ll also know where you can use low light when the sun rises or sets.
- That’s why site visits are important for getting a clear idea of what gear you need for your real estate photography shoot. Doing a site visit beforehand also helps mitigate any access issues to the property or issues getting the equipment you need for the interior photography shoot.
- Be prepared. The night before, charge your batteries and pack your gear up. Especially if shooting early in the morning the next day.
- Always shoot at an appropriate height, which is five feet for interiors.
- Keep the camera straight and on a tripod to avoid distortion.
- For editing, correct for the lens in use. Straighten verticals and horizontals.
- Be consistent – if the lights are turned off in one room, turn them off in all the rooms. Color correct if you keep lights on.
Your shot real estate photography list should look like this:
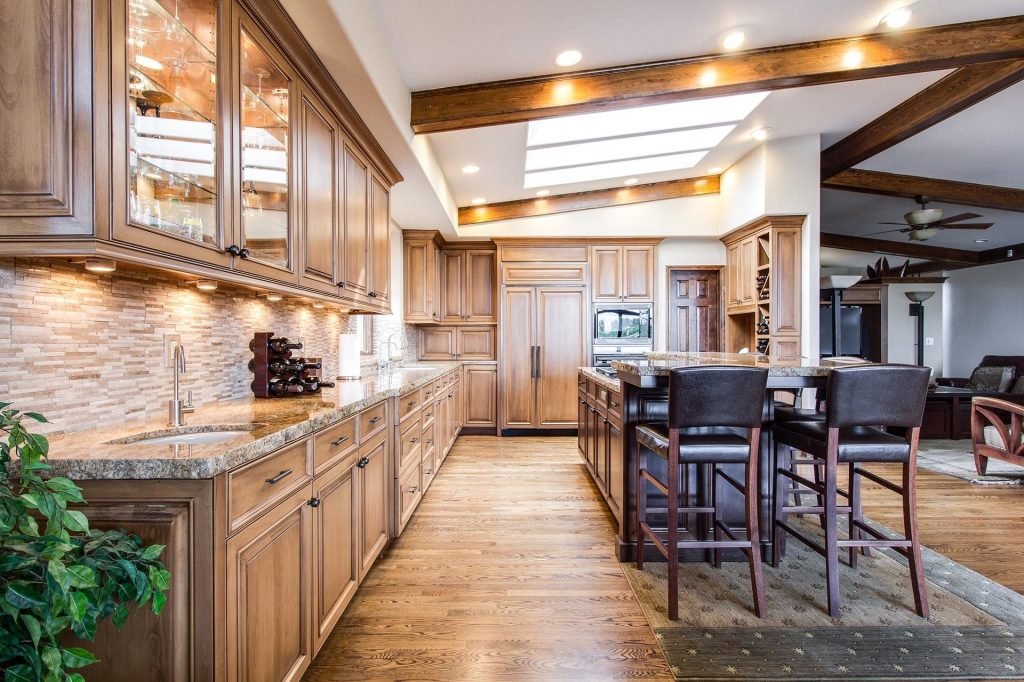
- At least two wide-angle shots each of bedrooms, kitchens, and living areas.
- Just one photo of the bathroom, unless it’s really spacious or has unique details.
- At least one but not more than three images of the backyard. If there’s good curb appeal get one or two shots of the front yard aka curb appeal.
- Once shot of each laundry room, garage, office, and pantry areas.
Conclusion – Real Estate Photography Tips
The best tip you can use with your real estate photography is to plan ahead. Next, use the right lighting and angles while shooting. And finally, edit well and in batches. We hope you learn as you start to experiment with real estate photography. Good luck!


