Last updated on December 4th, 2023
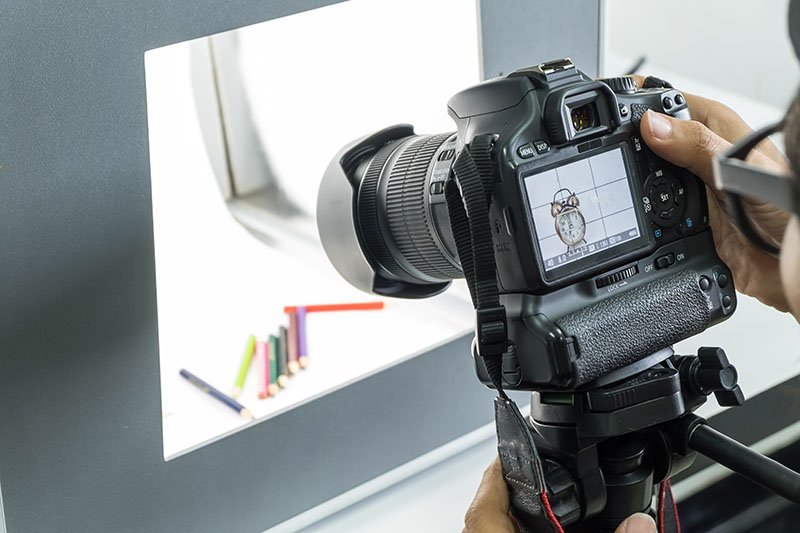
Lightbox photography has emerged as an essential tool for presenting products or other small-scale items in the best possible light. As a photographer, you might wonder how to choose the best portable lightbox for photography, which can be an overwhelming decision due to the vast range of options available. But worry no more, as we have curated a comprehensive guide for you that not only highlights the best portable lightboxes in the market but also demonstrates how you can utilize them to produce captivating lightbox photography that will enhance the appeal of your products or artistic creations.

In the following sections, we will explore the top portable lightboxes available, each distinct offering features and catering to different budgetary needs. Whether you’re looking for the best overall option, a budget-friendly alternative, or a large-scale lightbox for more sizable items, our guide will help you make an informed decision. We will also provide insights into the unique advantages of each lightbox, allowing you to understand how they can elevate your
photography skills and showcase your subjects in the most flattering manner. So, get ready to explore the world of lightbox photography and discover the best portable lightbox that meets your requirements and helps you create stunning visuals that make a lasting impression. 
Overall Best Portable Lightbox for Photography
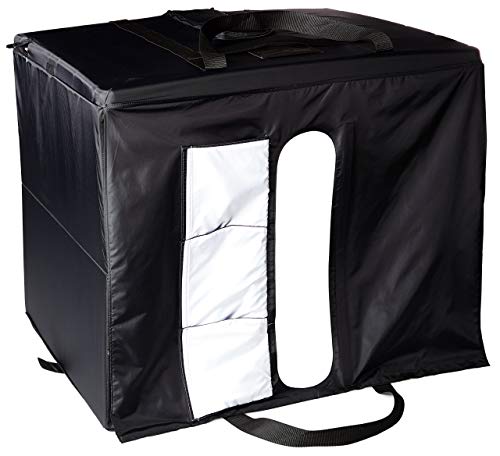
AmazonBasics Portable Foldable Photo Studio Box
The AmazonBasics Portable Foldable Photo Studio Box is our top pick for the best portable lightbox for photography. This versatile and user-friendly lightbox offers unparalleled convenience and efficiency, making it an ideal choice for photographers of all skill levels.
One of the most significant advantages of the AmazonBasics Portable Foldable Photo Studio Box is its hassle-free setup. With no assembly required, you can have it ready for lightbox photography in under a minute. Its collapsible design ensures quick and easy cleanup, making it perfect for those who require a portable solution.
Equipped with high-output LED lights, this lightbox allows for seamless handheld photography with both cameras and smartphones. Its 5600K daylight-balanced LEDs and a high Color Rendering Index (CRI) ensure accurate and vibrant color representation in your images. This combination of features guarantees stunning results with minimal effort.
Customers particularly appreciate the innovative front three-door system, which provides a variety of image angles while effectively reducing external reflections. Including an overhead shooting option further enhances the versatility of this lightbox, catering to a wide range of photography needs. 
Best Budget Portable Lightbox for Photography
PULUZ Mini Photo Studio Box
The PULUZ Mini Photo Studio Box is the best budget-friendly portable lightbox for photography. Despite its affordable price point, this compact lightbox offers an impressive range of features that allow you to produce professional-quality images without breaking the bank.
High brightness is one of the essential features of the PULUZ Mini Photo Studio Box, ensuring your images are well-lit and vibrant. This lightbox also supports multi-angle shooting and has a no-strobe effect, allowing you to easily capture stunning photographs. The quick setup process is another highlight, making it a convenient option for on-the-go photography.
Customers appreciate the USB power supply that comes with this lightbox, enabling them to efficiently power the device. The high-quality SMD LED beads incorporated into the design ensure that your product photos have a professional look, even on a budget.
One of the most significant advantages of the PULUZ Mini Photo Studio Box is its portability. Its compact size makes it perfect for photographers who need a convenient and space-saving solution for their lightbox photography needs. The lightweight design and easy setup process make it an ideal choice for those who frequently travel or work in different locations. 
Runner-up Best Portable Lightbox for Photography
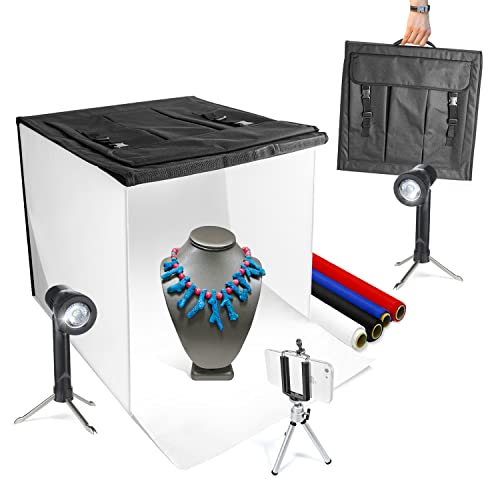
LimoStudio 16″ x 16″ Table Top Photo Lightbox
Our runner-up choice for the best portable lightbox for photography is the LimoStudio 16″ x 16″ Table Top Photo Lightbox. This affordable yet highly efficient lightbox delivers excellent results in lightbox photography, making it a favorite among customers seeking value for their money.
The LimoStudio 16″ x 16″ Table Top Photo Lightbox is designed to be both cost-effective and highly functional. Its compact size makes it suitable for capturing product images or creating small scenes that can be shared on platforms like Instagram or Pinterest. Its simplicity ensures photographers of all skill levels can make the most of this lightbox without complications.
A bonus feature that adds to the appeal of this lightbox is the sleek carrying bag that comes with it, allowing you to easily transport the lightbox. Whether you’re on the move or need a portable solution for various shooting locations, the LimoStudio lightbox has you covered.
Customers appreciate the affordability of the LimoStudio 16″ x 16″ Table Top Photo Lightbox, especially considering the high-quality lightbox photography it produces. Its compact design and user-friendly nature make it an attractive option for photographers requiring a budget-friendly, portable lightbox solution.
Best Portable Lightbox for Large Items
FOSITAN Photo Light Box
The FOSITAN Photo Light Box stands out as the best light box for large items due to its combination of high-quality features and user-friendly design. One of its primary advantages is its high-quality, convenient-design LED lights. These lights are equipped with SMD LED brads boasting an excellent Color Rendering Index (CRI) of over 95+, ensuring that the colors in your photos are vivid and true to life. The integrated nature of these lights means there is no need for separate installation, making the setup process much simpler and quicker.
Another key feature is the ability to adjust the brightness from 1% to 100%, accommodating a wide range of shooting needs. This versatility is enhanced by the inclusion of a diffuser, which softens the light to produce more natural-looking photographs, crucial for capturing the true essence of larger items.
The FOSITAN Photo Light Box also includes a diverse range of background options. With six colors (black, white, orange, red, blue, and green) and two upgraded backgrounds (black and white), it offers unparalleled flexibility in creating the perfect backdrop for any item. This variety is particularly beneficial for photographing large items, as it allows for the creation of contrasting environments that highlight the item’s features.
Ease of setup is another significant advantage. The one-piece structure design facilitates a quick, 10-second installation, and the light box can be easily folded into a storage bag for portability. This feature is invaluable for photographers who need to set up a professional-quality studio in different locations.
Additionally, the light box supports multiple shooting angles, which is essential for photographing large items. This capability ensures that every aspect of the item can be captured from the most flattering angles.
Best Portable Lightbox Under $100
DUCLUS Portable Photo Studio Box
The DUCLUS Portable Photo Studio Box is a fantastic option for those seeking a portable lightbox for photography under $100. This self-contained, all-in-one lightbox offers an impressive array of features tailored for capturing stunning images of small to medium-sized objects, making it a valuable addition to any photographer’s toolkit.
The DUCLUS Portable Photo Studio Box comes with 5500K daylight LEDs, providing perfect lighting conditions right out of the box. The light tent unfolds effortlessly, and you’re ready to start shooting. The studio features a front horizontal shooting window, ideal for capturing multiple staged shots, especially when working in an unfamiliar space. Additionally, the vertical window offers a particularly convenient and flattering angle for product photography.
One of the standout features of this lightbox is the brightness dimmer, which allows you to control the mood lighting in your photographs. With a range of 10%-100% brightness levels, you can easily adjust the lighting to suit your needs. The lightbox also includes a nylon carrying bag with straps, making transportation a breeze.
The DUCLUS Portable Photo Studio Box offers exceptional convenience, portability, and functionality for photographers seeking a high-quality lightbox under $100. Its array of features, such as adjustable brightness levels and convenient shooting windows, makes it an invaluable tool for capturing professional-quality images without breaking the bank. 
Best Portable Lightbox Under $50
Emart 14″ x 16″ Photography Table Top Light Box
The Emart 14″ x 16″ Photography Table Top Light Box is our top pick for the best portable lightbox for photography under $50. This affordable and compact lightbox delivers professional-quality results without sacrificing convenience, making it an ideal choice for photographers on a budget.
Simplicity is at the core of the Emart 14″ x 16″ Photography Table Top Light Box design. Its portability and ease of setup make it perfect for photographers who need a reliable and efficient solution for their lightbox photography needs. The lightbox is equipped with a micro USB port power cable and a power bank, enabling you to set up like a pro, even on the go.
Customers appreciate this lightbox’s powerful LED light strips, rated at 10W 5500K, which provide continuous and evenly distributed lighting for tabletop shooting. This feature ensures that your images are well-lit and vibrant, rivaling the results of more expensive lightboxes.
When you’ve completed your photography session, the top loop handles make it easy to carry your lightbox, allowing you to shoot lightbox photography anywhere. Its compact size and lightweight design make it a practical and versatile choice for photographers who require an affordable and portable lightbox solution.
Honorable Mentions
 Neewer 24×24 inch Photo Studio Shooting Tent Light Cube Diffusion Soft Box Kit
The Neewer 24×24 inch/60×60 cm Photo Studio Shooting Tent Light Cube Diffusion Soft Box Kit is an outstanding option for those seeking an affordable and versatile portable lightbox for photography. This budget-friendly kit offers a comprehensive solution for photographers, enabling them to easily capture professional-quality images.
The Neewer lightbox photography kit is designed to provide everything you need for a successful shoot. The lightbox features an opening that allows easy image capture, ensuring you can quickly and conveniently produce stunning photographs. This lightbox is especially beneficial for photographers who must eliminate reflections and shadows in their images, as it produces consistently clean lightbox photography results. You will have to buy LED lights separately.
A significant advantage of this lightbox is the custom carrying case that comes with it, featuring both shoulder and hand straps. This thoughtful design allows you to easily transport the lightbox, making it perfect for photographers who need a portable solution for various shooting locations.
Customers appreciate the affordable Neewer 24×24 inch/60×60 cm Photo Studio Shooting Tent Light Cube Diffusion Soft Box Kit and its high-quality results. The lightbox’s ability to eliminate reflections and shadows, combined with its ease of use, makes it a popular choice among photographers who require an efficient and budget-friendly lightbox photography solution. 
Foldio3 + Halo Bar + Foldio360
The Foldio3 + Halo Bar + Foldio360 is a highly innovative and versatile portable lightbox for photography that offers a unique combination of features to enhance your photographic experience. This lightbox is designed to focus on size and portability, allowing you to take it wherever you go and set it up in just ten seconds.
The Foldio3 lightbox has a triple LED lighting system, ensuring your images are well-lit and vibrant. This feature helps you capture professional-quality photographs that truly showcase your products or works of art. Additionally, the Foldio360 enables you to create stunning 360-degree images with just a click of a button, adding an extra layer of visual interest to your photography.
One of the standout features of this lightbox is the Halo Bar, which, when used with the dimming controller, allows you to create optimal lighting conditions for your specific needs. The Halo Bar provides a customizable lighting solution that enables you to achieve the best possible results in your lightbox photography.
The Foldio3 lightbox also offers the ability to arrange studio backdrops effortlessly, with different color options that help to eliminate reflections during lightbox photography. This feature ensures that your images have a clean and professional appearance, regardless of your shooting environment. 
MyStudio MS20LED Professional Tabletop Lightbox
The MyStudio MS20LED Professional Tabletop Lightbox Photo Studio is an exceptional choice for photographers who prioritize quality and performance in their portable lightbox for photography. This lightbox is designed to deliver crisp, clean photos with a seamless cyclorama infinity background that provides 90-degree shooting angles and depth not typically available in most lightboxes.
One of the critical features of the MyStudio MS20LED Professional Tabletop Lightbox is its even lighting distribution, which ensures that your product or object shots are consistently well-lit and vibrant. This is achieved through the carefully designed LED lighting system, which creates an optimal environment for capturing professional-quality images.
Customers appreciate the long lifespan of this lightbox, which boasts an impressive 30,000-hour operating time. This longevity ensures you will get the most use out of your investment, making it a cost-effective option for photographers requiring a reliable and high-performing lightbox for their work.
The MyStudio MS20LED Professional Tabletop Lightbox is perfect for photographers who need a portable lightbox that delivers the exceptional image clarity and depth results. Its unique design, even lighting distribution, and long-lasting performance makes it an ideal choice for those seeking a high-quality lightbox that can handle the demands of professional photography.
Glendan Portable Photo Studio Light Box
The Glendan Portable Photo Studio Light Box is an excellent choice for photographers seeking versatility, convenience, and professional-quality results. A standout feature of this light box is its stepless dimming capability. With 112 high-quality LED light beads that offer a dimmable range from 0% to 100%, it allows for precise control over the brightness, enabling users to create the desired lighting effect for any subject. The high Color Rendering Index (CRI) of 95+ ensures that the colors in photographs are vibrant and true to life, while the absence of strobe results in brighter, softer lights, leading to more natural and textured photos.
The multi-angle shooting feature is another significant advantage. The light box’s design with multiple openings enables photographers to choose the best shooting position, capturing the product’s features and beauty from various perspectives. This is particularly beneficial when photographing intricate or detailed items.
Included with the light box are six color backdrops (white, black, orange, blue, green, red) made of thick, wrinkle-free PVC. These sturdy backdrops provide a diverse range of shooting environments and are easy to change, adding to the light box’s versatility.
The ease of assembly is a key aspect of the Glendan Portable Photo Studio Light Box. Designed for quick and easy setup, it can be assembled in seconds without the need for brackets, screws, or complicated lighting layouts. This, combined with its folding design and a durable, waterproof carry bag, makes it incredibly convenient for on-the-go photography.
Additionally, the inclusion of special inner reflection boards and a light diffuser enhances the photography experience. These accessories are particularly useful for shooting highly reflective products, ensuring detailed contours and reducing unwanted glare.
Frequently Asked Questions (FAQs)
What is a portable lightbox for photography?
A portable lightbox for photography is a compact, foldable, and easy-to-carry studio setup that lets photographers take professional-quality images of small to medium-sized objects. It typically includes LED lights and backdrops to create optimal lighting conditions and eliminate reflections and shadows.
Why should I use a portable lightbox for photography?
A portable lightbox allows you to achieve consistent lighting conditions, essential for capturing high-quality product or object photographs. It eliminates reflections and shadows, making your images appear more professional. Additionally, a portable lightbox is easy to set up, take down, and transport, making it ideal for photographers who need a versatile solution for different shooting locations.
What features should I look for in a portable lightbox for photography?
When selecting a portable lightbox for photography, consider the following features:
- Size and portability: Ensure the lightbox is easy to carry, set up, and take down.
- LED lighting: Look for adjustable and dimmable LED lights to create optimal lighting conditions.
- Backdrops: Choose a lightbox with multiple backdrop options to suit your needs.
- Ease of use: Opt for a user-friendly lightbox that caters to photographers of all skill levels.
- Durability: Select a lightbox with a robust design and long-lasting LED lights.
Can I use a portable lightbox for photography with my smartphone?
Yes, you can use a portable lightbox for photography with your smartphone. Most lightboxes are designed to work with DSLR cameras and smartphones, enabling you to capture professional-quality images without needing a dedicated camera.
How much does a portable lightbox for photography cost?
Portable lightboxes for photography can range from under $50 for budget options to over $300 for professional-grade models. The cost depends on the lightbox’s size, features, and overall quality.


